
There’s a reason no longer turn their nose up at Garageband, and that’s because for simple projects, it’s the perfect program. What is essentially a differently named ‘lite’ version of Apple’s flagship DAW Logic Pro, Garageband serves as the perfect program to record simple projects, whether recording your podcast on the fly or demoing your next song. If you’re an Apple user you’re in luck as since 2014 Garageband, like iMovie, has been free to those who own a Mac or iPhone and thus makes it a great low-cost way to start producing and making your podcast.
Although it’s essentially a simplified version of Logic, don’t be fooled into thinking that Garageband doesn’t have plenty to offer, and in fact, unless you are planning to create complex podcasts with lots of different features and elements, or really want to dig deep into mixing and editing, Garageband is probably all you need. It’s simple, intuitive, and has a lot of the same plugins and qualities that Logic has to offer, but for free.
Just like every recording project, the best way to work with Garageband is to make sure you get the best quality audio possible before hitting record. Garageband is a great DAW, but it does have its limitations. To get the best out of it and create the easiest, stress-free recording environment, the less editing you need to do with your audio in post-production, the better.
In this article, I’m going to show you how to use Garageband to record a one on one interview for your podcast.
Table of Contents
Setting things up
Here I’m going to show you how to set up Garageband to record an interview with you and your interviewee. In this tutorial I will be using an external interface, in this case, the Focusrite Scarlet 2i2 (follow this link for how to set up your interface) and one microphone for each person being recorded.
When you load up Garageband you are immediately faced with the ‘Choose a Project’ window.
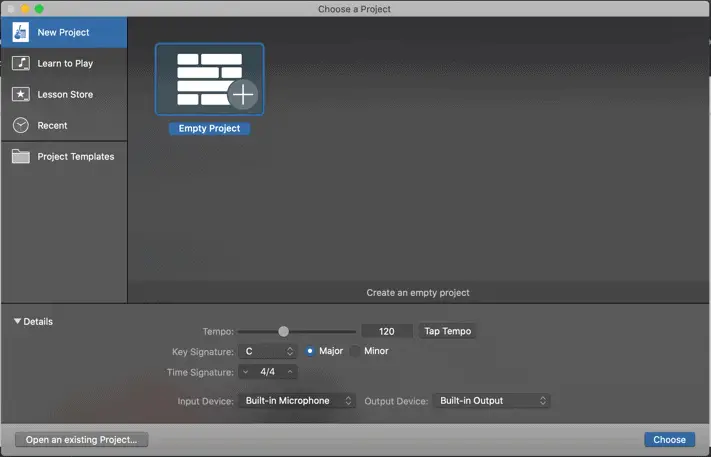
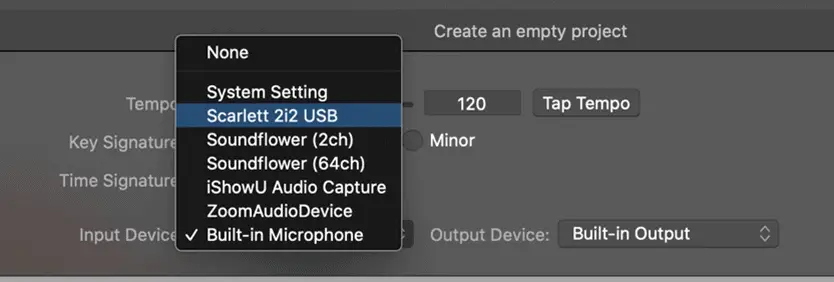
Before you choose ‘Empty Project’, head down to the Input and Output Device dropdown menus and make sure you select your interface for at least the input device. I’d recommend doing this for output also (make sure your headphones are plugged into the interface though!), as you’ll get slightly less latency if you want to monitor your recordings as you go. Just ignore the Tempo/Key Signature/Time Signature stuff, that’s not relevant here.
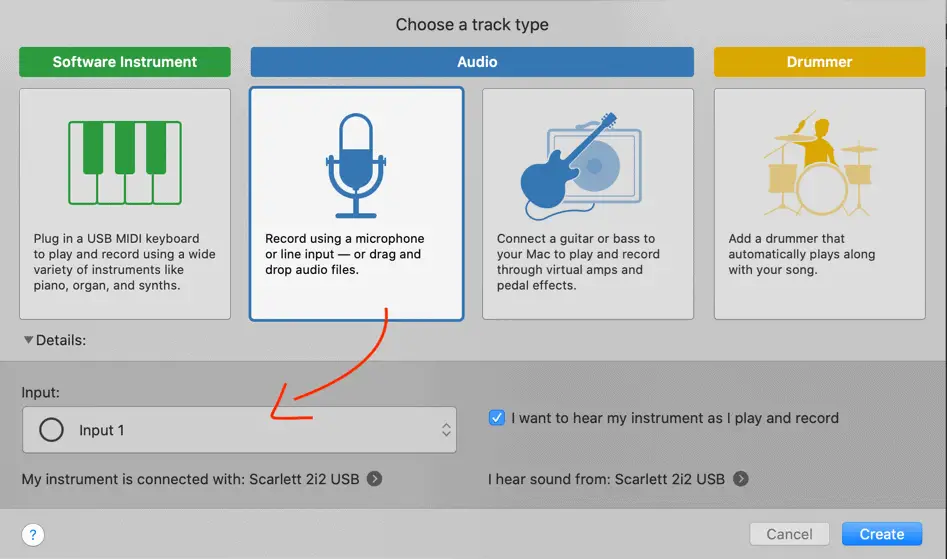
Once you’ve done this, click on ‘Empty Project’ and you’ll be greeted with ‘Choose a Track Type’. ‘Record Using a Microphone’ should already be selected. Make sure you have Input 1 selected on the drop-down menu and tick ‘I want to hear my instrument as I play and record. If you don’t do this last step, don’t fret, it’s very easily remedied.
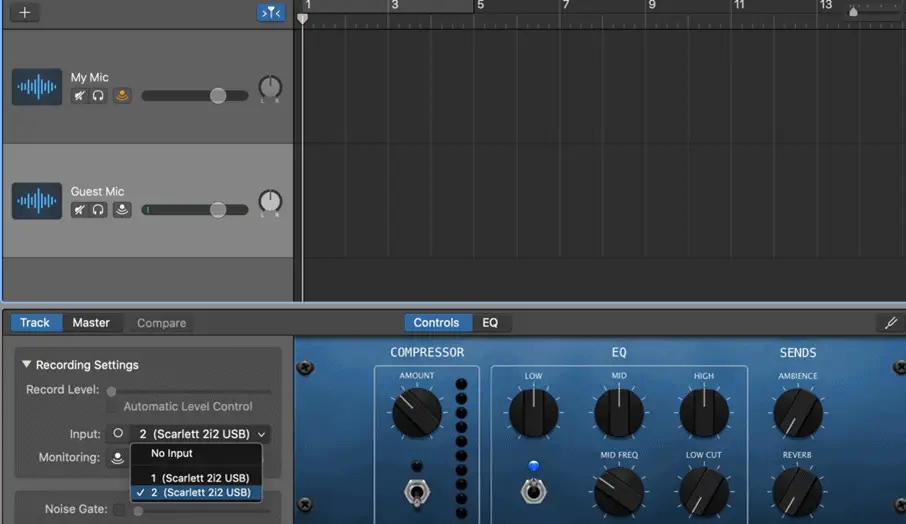
Once you’re in, you’ll have your audio track already set up and ready to go. Next, you need to set up your guest. To add a second track, you can either hit ‘New Track’ in the ‘Track’ menu up top and repeat the same process but instead of choosing INPUT 1, choose INPUT 2 in the ‘Choose a track’ window. Or you can double click under your original track and a new track will appear. However, If you do it this way, make sure to change the input. You do this in the control panel at the bottom.
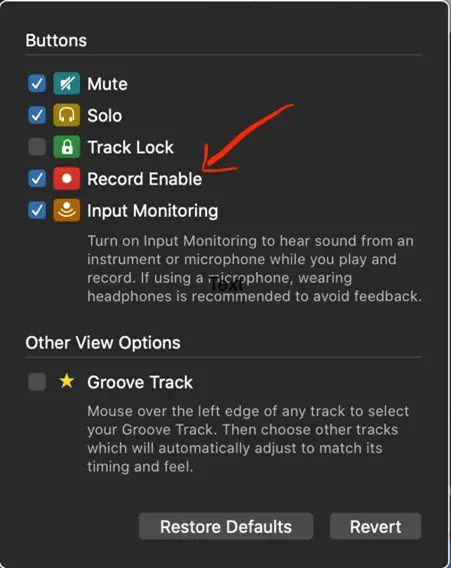
You’re almost there. Rather irritatingly, Apple has by default hidden the ‘record enable’ button on tracks. Enabling this is VERY IMPORTANT – without doing this you won’t be able to record using both microphones at once. Luckily this isn’t difficult to do, again, go to the ‘Track’ menu, hit ‘Configure Track Header’, and make sure the ‘Record Enable’ button is checked.
Now that this is done make sure the levels on each channel of your interface are not too loud (so not to cause popping or clipping) and that each microphone has it’s ‘Record Enable’ selected and you’re good to go. Hit the big red ‘record’ button in the top bar and you’ll start recording.
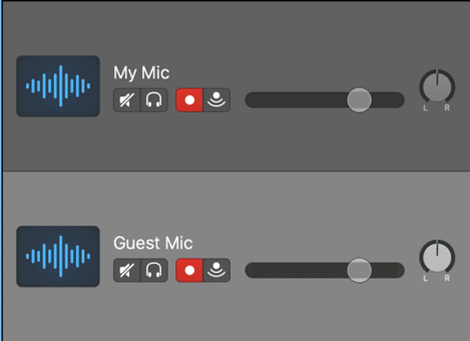
If you want to have each guest wearing headphones, (with the Focusrite 2i2, you’ll need a separate headphone splitter – they’re cheap and easy to find), make sure the monitoring button is checked on each track. However, if you’re in the same room, as long as you’ve made sure your levels are OK, this is probably not that necessary and in fact, may make it a more relaxed interview experience for your guest.

Mixing
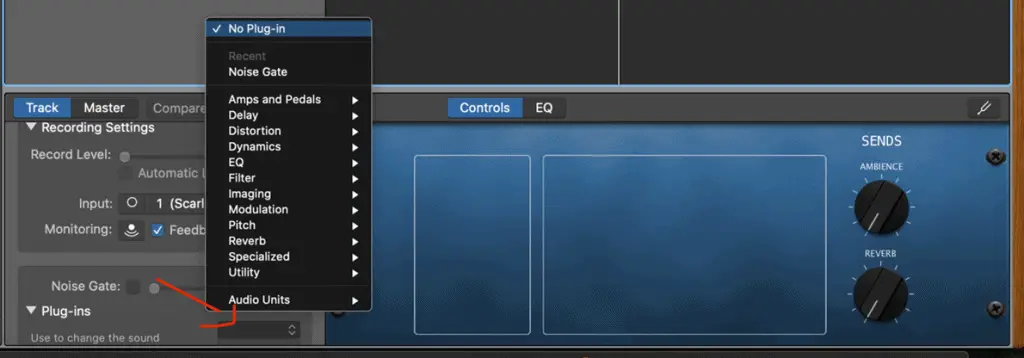
Once you have recorded your interview, you’ll want to mix it. Doing this on Garageband is simple. When you have a track selected, you’ll see the ‘Control’ and ‘EQ’ box at the bottom. To change the ‘Compressor’ or the EQ click the blank box next to Plug-Ins and find Compressor under ‘Dynamics’. If you’re not well acquainted with compression and EQ’ing I’d thoroughly recommend using their presets as they’re simple to use, effective and they’ll make your podcast sound much better.
Saving and ‘Bouncing Down’
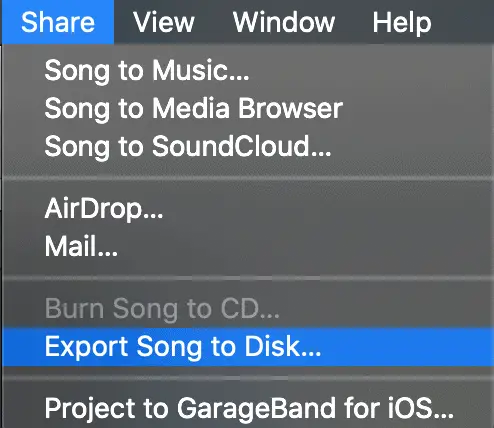
What probably should go without saying is remember to regularly save your project. When you’re ready to export your interview, hit ‘Share’ at the top and ‘Export Your Song to Disk’. Ideally, you want it as a .wav file, this will make it the best quality possible for when you upload it to your chosen podcast host.
And we’re Done!
And there you have it! Once you’ve got the basics down, Garageband is super easy and intuitive to use – it is a really great starting point in the world of home recording and mixing. For quick, quality recordings you really can’t go wrong.